Originally Posted on The Coaching Tools Company as 10 Easy Steps To Create Your Own Coaching Tool, Exercise or Workshop Handout!
Do you want to create a coaching tool, exercise, seminar handout or worksheet? Well, while it may take you a few hours to put it together, creating your own tool or worksheet gives your clients and workshop attendees a really personalised coaching experience.
Plus, a great handout helps people identify powerful learnings, take action and gives them something to remember you by. In short—branded worksheets and tools are like a brochure for you that people want to keep.
If you’re wondering what Coaching Tools are, try our Complete Guide to Coaching Tools here >>
So, here are 10 Easy Steps to Create a One Page Coaching Exercise or Seminar Handout
STEP 1) Choose a (working) title
Begin by choosing a title (or working title!) for your Workshop Handout or Exercise.
Then write it at the top of the page, making it big and bold!
STEP 2) What outcomes do you want from the worksheet? 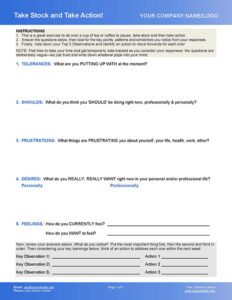
What information do you want to share? What do you want people to learn about themselves?
Thinking about your Workshop or Exercise, answer the following questions:
-
- What is the learning, concept, coaching wisdom or knowledge that you want your clients/workshop attendees to leave with?
- What important information would you like them to really remember? (up to 3 concepts/ideas)
- What are up to 3 key learnings (about themselves) you would like people to have?
- What inspirational quote sums up the learning/lesson?
- What kind of action do I want the attendees to take following the session?
Now, using the information you wrote down above, write out the following out on separate lines below your worksheet title:
- A short introduction or background that gives people an idea of what they’ll be covering in this exercise. Ideally keep this to 1-3 sentences.
- Up to 3 key heading names for the key concepts, areas and ideas you want to them to learn.
- Up to 3 powerful questions for your client or workshop attendees to learn about themselves that are relevant to your worksheet topic.
TIP: Don’t worry about the order yet, we will move things around next.
STEP 3) Add your “flow” to the worksheet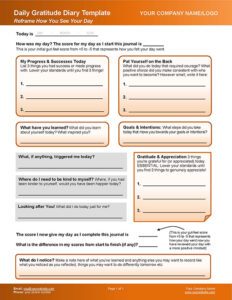
Now, thinking about flow, put the introduction at the top, then reorder your headings and questions so that they make sense and follow each other in a logical flowing sequence.
Include any short instructions you may need to add for clarity in a smaller font underneath each heading.
TIP: Imagine you are someone completing this worksheet. Do the headings and questions make sense? How does it ‘feel’ as you go from one question to the next? Would it be better in another order?
STEP 4) Add areas on the worksheet for people to write their answers
- Number each step and use …………….., ________ or add a box for the attendees to write their answers on/in.
STEP 5) What action will they take?
At the end of your form, ask “What Action/s will you take?” (copy the example below if you like):
| So, it’s time to identify 1-3 specific actions you will commit to. Make sure this action is something you can implement right away—or in the next day or so. Only pick actions you are 100% sure you will complete—and if necessary make the action smaller until you can commit to it one hundred percent.
Action 1 _________________________________________________ by when ______________ |
STEP 6) Format your words for emphasis
- Review your worksheet and use bold, italics or CAPITALS to highlight key words in your headings and questions.
OPTIONAL STEP 7) Add a quote 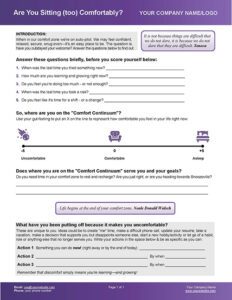
- If it fits, add in a quote that sums up the workshop learning/lesson at the very bottom of the worksheet.
- You can put it into a nice scripty font to add some interest—and add a coloured box around it if you like.
OPTIONAL STEP 8) Add in some imagery
- Add in some small images that represent the questions or learnings.
and/or - If you like, create a front cover for your worksheet with an inspiring image.
TIP: Be sure to source your images from official sources. And if you plan to sell your worksheet, ensure you use a “royalty free” image and have the right image license.
STEP 9) Review and Choose a Final Title!
- If you can, use a spelling and grammar check to look for obvious errors and improvements.
- Now take a look over your worksheet and read it through from start to finish.
- Finally, review your working title and see if you can come up with a better name for this worksheet. What will it help people learn or understand? Then update the title at the top.
TIP: You could also give this worksheet to someone else to review and give you feedback.
STEP 10) Add your branding and contact details
Finally, put your company name and logo in the header* area of your worksheet—and your phone/email and website in the ‘footer’ area.
* If you’re not sure what headers and footers are or don’t know how to use them, you may find this article on how to add your information to headers/footers in our tools helpful.
Well done – you’ve created a Coaching Worksheet!
Final Tips to Create a Great Coaching Worksheet, Exercise or Handout
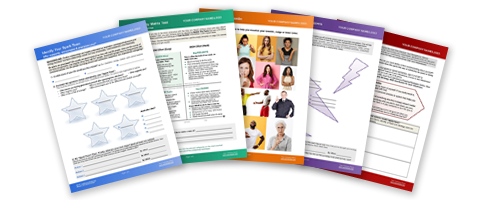 People are more likely to hang onto something if it looks attractive! So once, you’ve finished, take a look at your worksheet and review these bullet points:
- Give less space to answer rather than more. This will look less daunting and more inviting. So, keep the answer space to NO MORE than 3 lines or it can seem overwhelming. If they’re inspired they can always turn over and write on the other side!
- Add white space between responses and keep the worksheet uncluttered. This will look more professional.
- Take the time to find relevant images or icons—and use colour. This makes the worksheet more fun and helps people access their creative right brain.
- Even a Business, Executive or Career-focused seminar can have graphics and colour, but make sure the images you choose are appropriate to your audience.
If you liked this article about creating your own exercise/handout you may also like:
- 9 Fun Coaching Activities & Exercises I Would Not Be Without
- 10 Different Kinds of Tools for Coaching You Could Create Yourself! (with lots of examples)
- Coaching Tools 101: 12 Awesome New Ways To Use The Wheel of Life in Your Coaching Practice

